Page History
...
- Start Protégé and open an ontology. Any ontology will work. A dialog may appear asking you about importing OWL files; if so, click Cancel.
- Open the Save tab under Preferences and ensure ‘Use XML Entities’ is NOT checked.
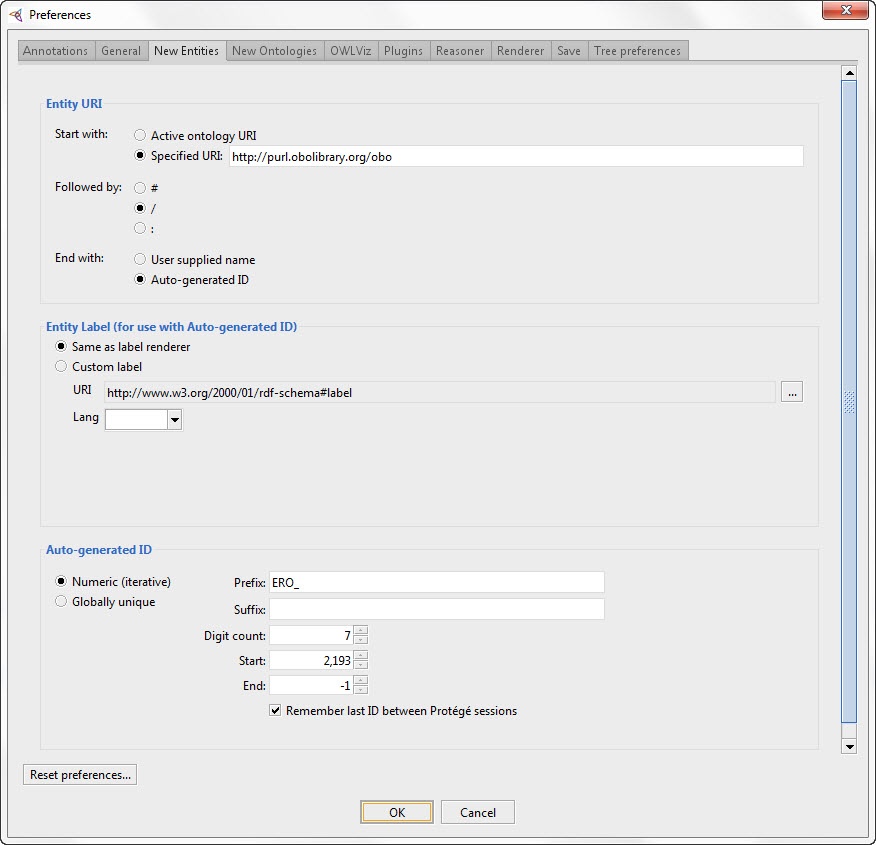
- Go to: Preferences > New Entities and set up your new entity URI settings as shown in the figures below:
 |
...
| icon | false |
|---|
Entity URI
|
Step 4: Reasoning
The reasoner tests the logic and consistency of the asserted axioms in the ontology and computes the inferred hierarchy. The suggested reasoner for eagle-i is FaCT++. It is good practice to run the reasoner periodically before committing, to ensure nothing has been accidentally moved.
The ‘Class hierarchy’ tab shows only the asserted hierarchy; the ‘Class hierarchy (inferred)’ tab shows the inferred hierarchy relationships (i.e. the hierarchy seen in the software). The inferred hierarchy is only visible after the reasoner has been run in that file.
Viewing the eagle-i ontology
...
Before viewing or editing the ontology, make sure you’re looking at the most current version:
...
Overview
Content Tools