This section contains specific instructions for eagle-i editors who are working with the ontology in Protégé, as well as an overview of the general workflow for various common editing tasks.
Setting up Protégé
Step 1: Download Protégé
- Download OBI-friendly Protégé 4.3 or 5: http://protege.stanford.edu/
- If prompted, do not install updates for the plugins, as the plugin versions contained in the download work specifically with OBI.
Step 2: Configure Protégé
If you are editing for the first time in Protégé, you will need to adjust the settings (should only need to be done once).
- Start Protégé and open an ontology. Any ontology will work. A dialog may appear asking you about importing OWL files; if so, click Cancel.
- Open the Save tab under Preferences and ensure ‘Use XML Entities’ is NOT checked.
- Go to: Preferences > New Entities and set up your new entity URI settings as shown below:
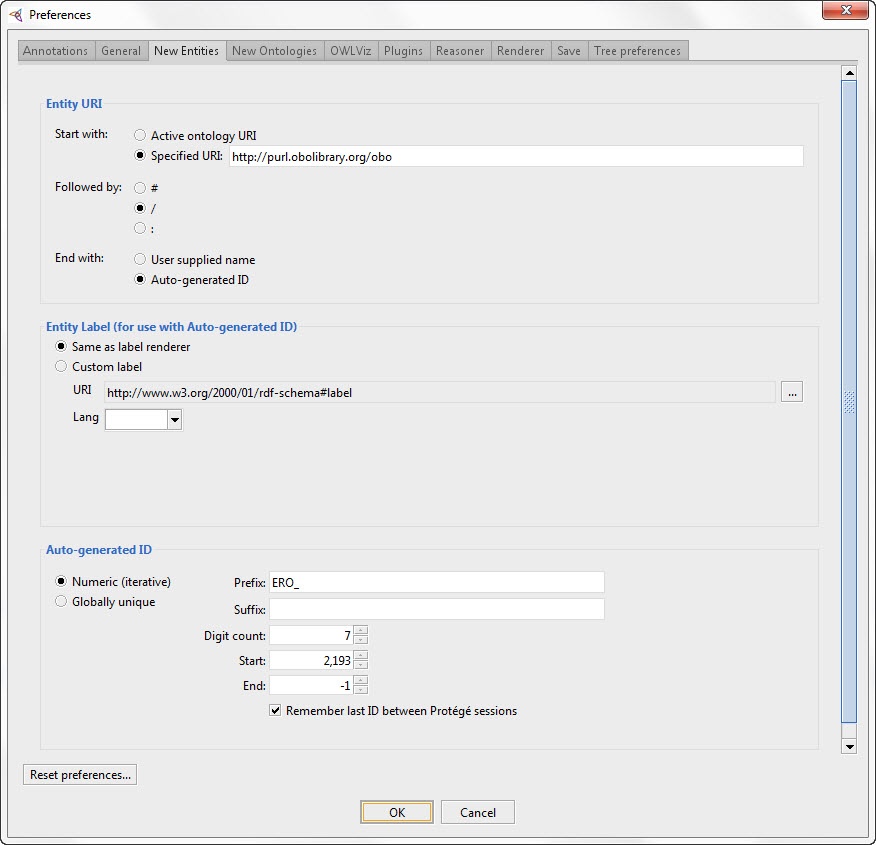 | Entity URI
Entity Label (for use with Auto-generated ID)
Auto-generated ID
|
Step 4: Reasoning
The reasoner tests the logic and consistency of the asserted axioms in the ontology and computes the inferred hierarchy. The suggested reasoner for eagle-i is FaCT++. It is good practice to run the reasoner periodically before committing, to ensure nothing has been accidentally moved. The ‘Class hierarchy’ tab shows only the asserted hierarchy; the ‘Class hierarchy (inferred)’ tab shows the inferred hierarchy relationships (i.e. the hierarchy seen in the software). The inferred hierarchy is only visible after the reasoner has been run in that file.
Viewing the eagle-i ontology
Before viewing or editing the ontology, make sure you’re looking at the most current version:
- Update the ontology trunk in your Subversion repository to get the latest changes: https://open.med.harvard.edu/svn/eagle-i-dev/datamodel/trunk.
- Use the module scripts to generate the local ontology
- Right click on the
src\isf\module-scriptsfolder and select ‘Open in Terminal’ to open a command window. (Note: these instructions are specific to the SmartSVN client, but a variation on this workflow should be possible from other clients. See Ontology File Structure > src/isf/module-scripts for more details.) - Type
ei-all.bat(for Windows) and hit enter. The script is done when the command prompt reappears. This process will take some time and potentially slow your computer down.
- Right click on the
- Depending on what part of the ontology you wish to view, open one of the following OWL files in Protege:
eaglei-modules-top.owl— imports the source (the ISF), the module configuration, and the exclude and include files.eaglei-module-configuration.owl— shows only the source (ISF) and the module configuration.eagle-i-extended-app.owl— shows both the eagle-i ontology generated and application OWL files.
Reminder: do not edit the generated files. Any direct edits of the generated files will not be committed to SVN (these files are SVN ignored) and they will be lost the next time the scripts are ran. Only view these files in Protégé:
- Select Show all loaded ontologies under View settings to show terms from all files. Terms in bold are contained in the current active file. Hover over the name of unbolded terms to see their actual location.
- Show the imports closure of the active ontology shows terms both directly and indirectly imported into that file.
- Show only the active ontology shows only terms contained in the active file; no imports.
Overview
Content Tools